
User Sign Up
🚪 Learn how to access the IDKit portal.
Set Up Your Account
Follow the steps discussed below to learn how to sign-up and set up your account.
Note:
To sign up, you will need your IDKit registered email address and an authenticator app on your mobile phone (e.g., Google Authenticator, Microsoft Authenticator, Authy, etc.).
- After receiving the email invitation, click on the Get started! button.
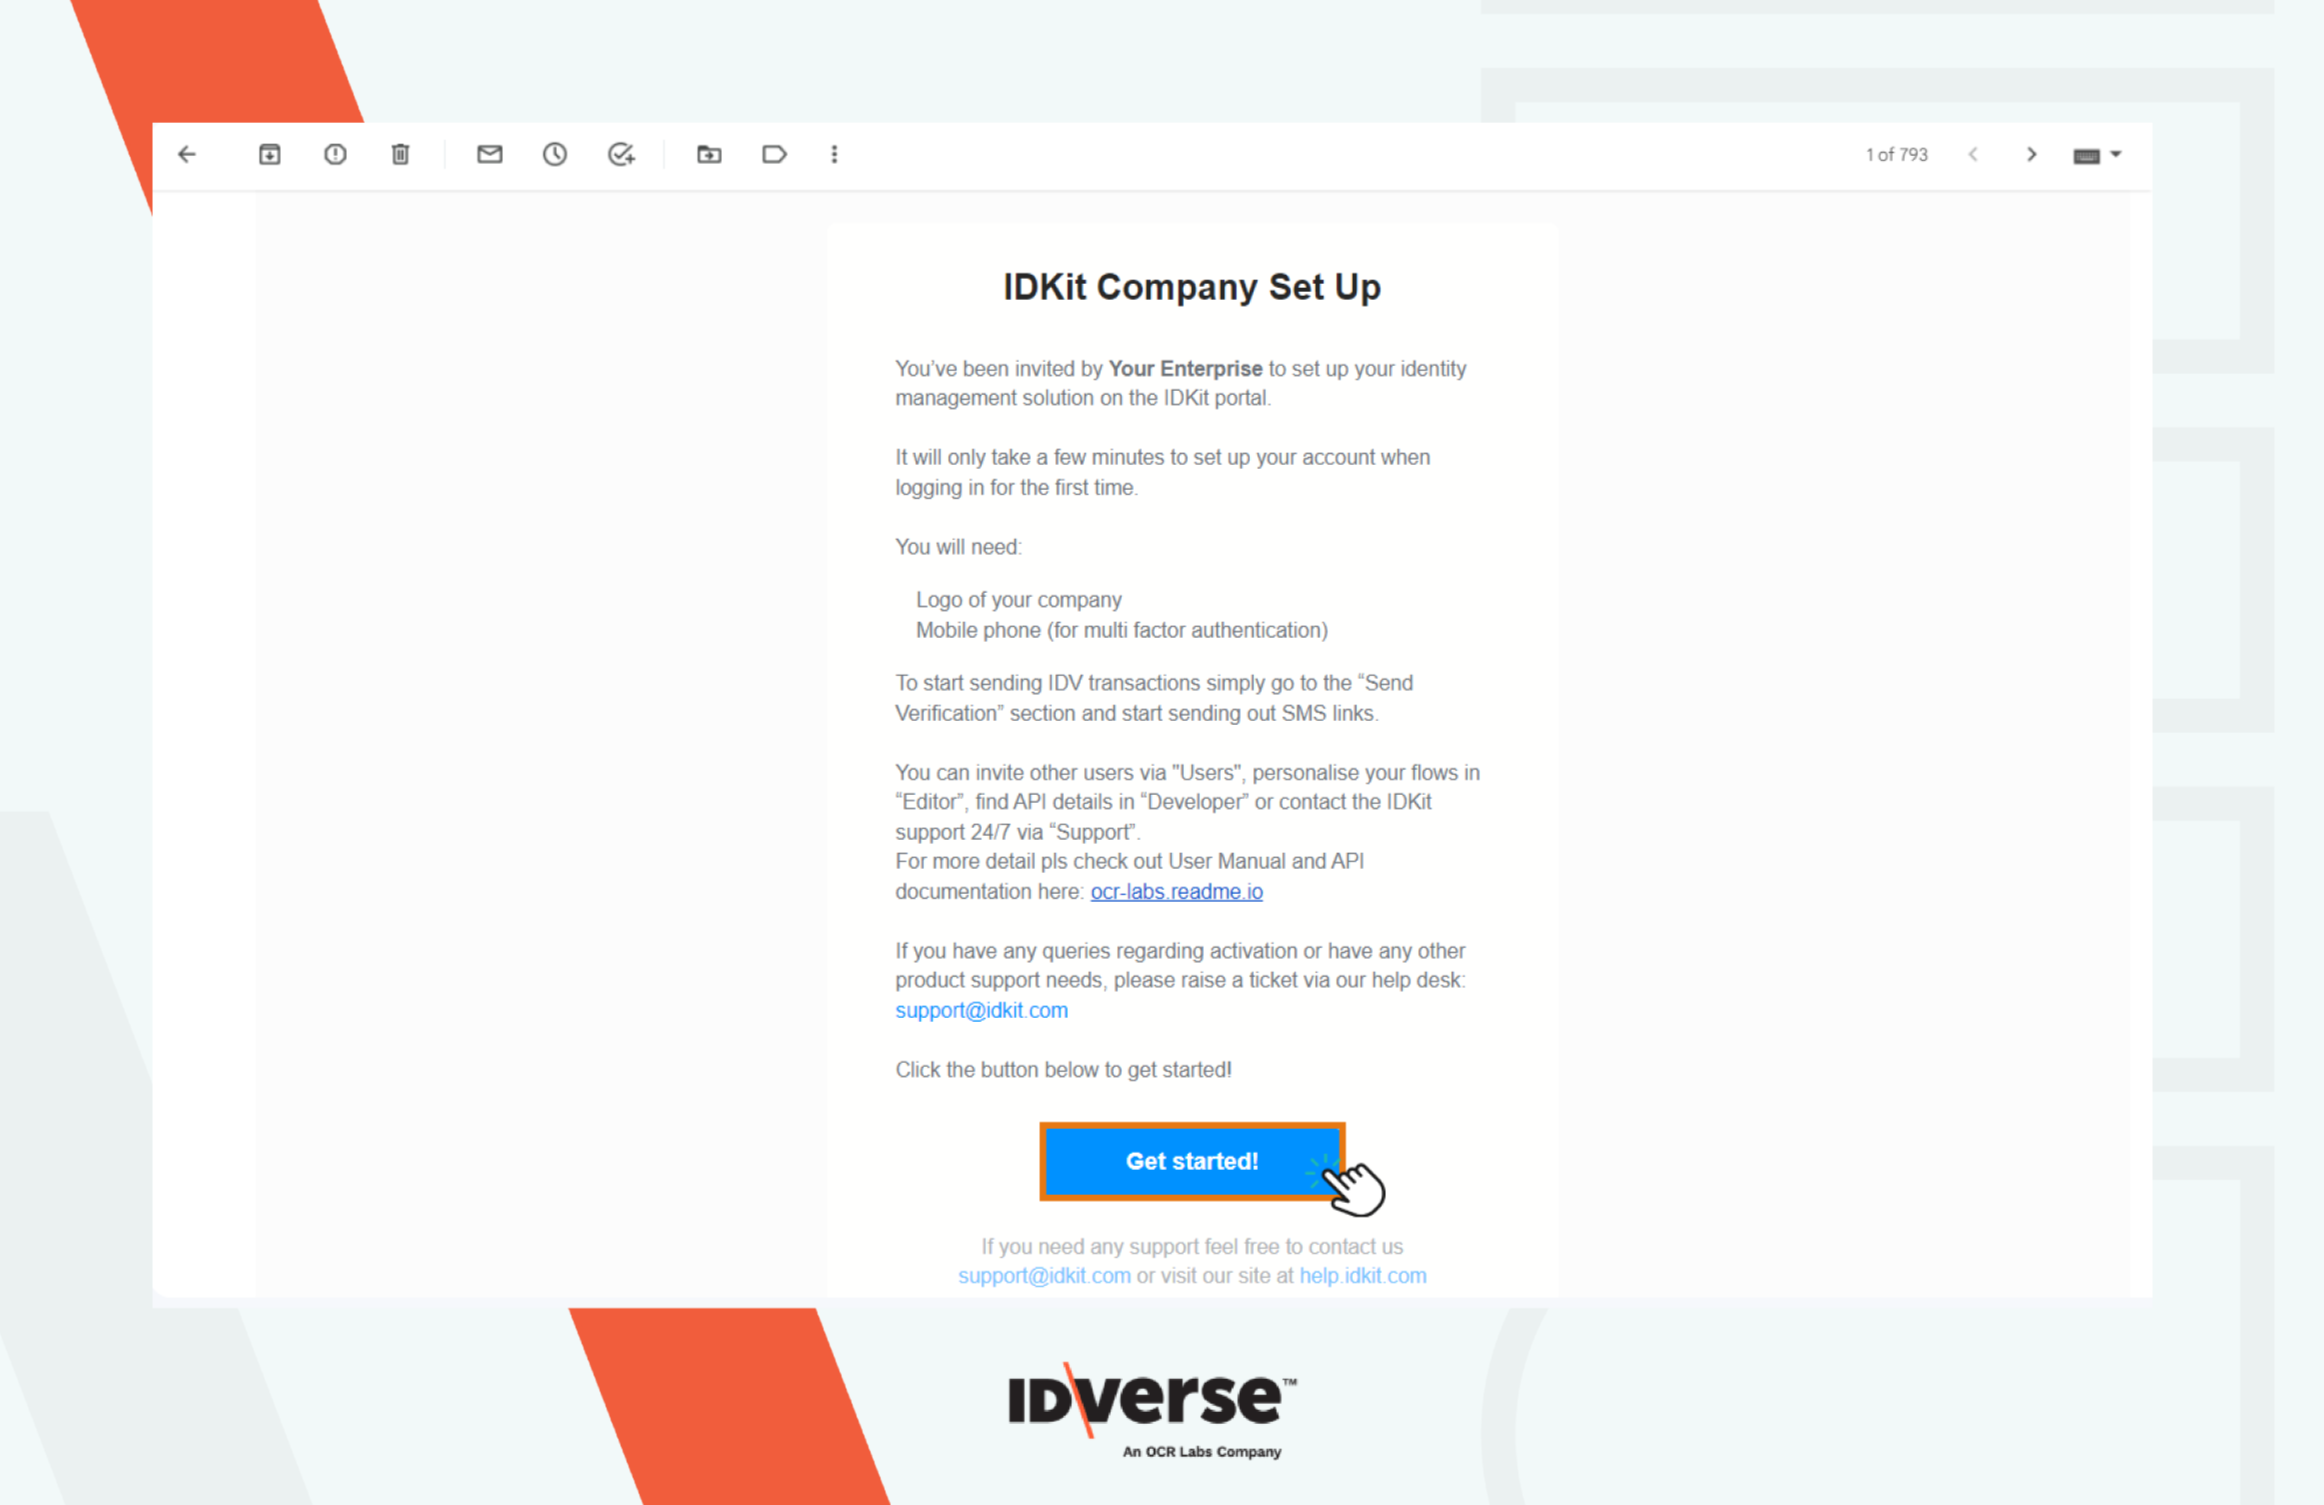
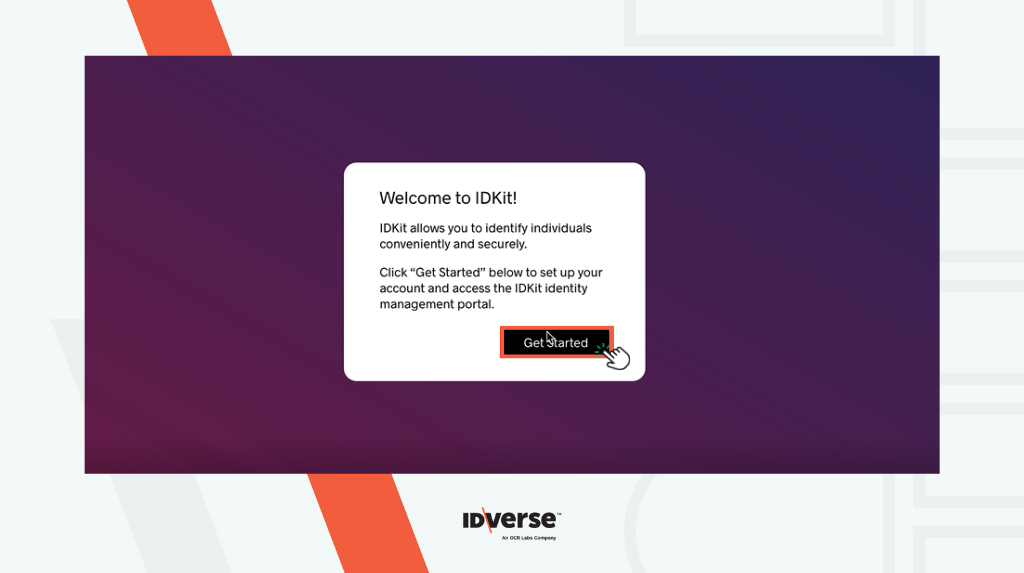
- You will be redirected to the very first page of the IDKit portal > click on the Get Started button.
-
Type in and confirm the new password.
-
Click Next to proceed.

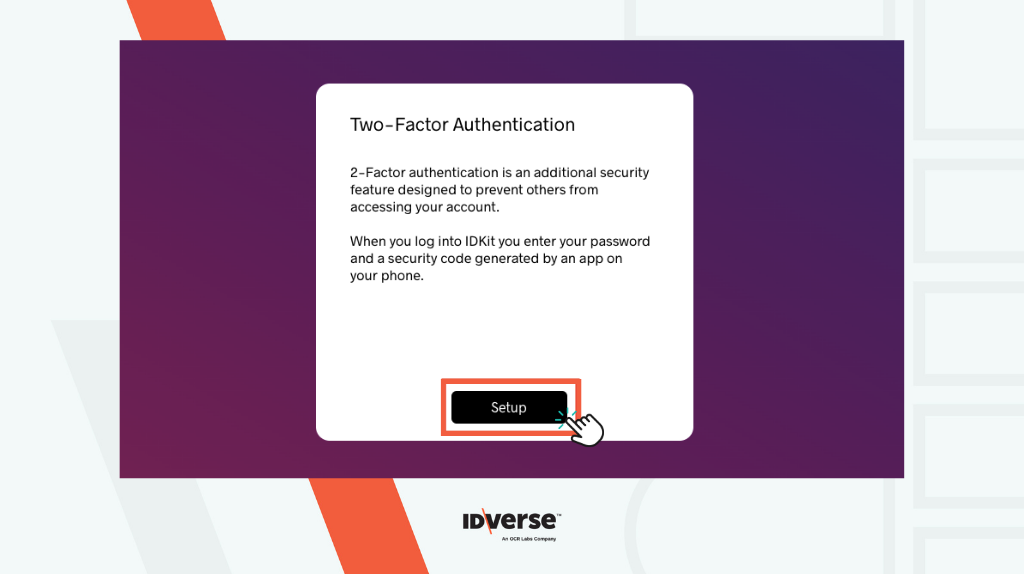
- Click on the Setup button to setup your Two-Factor Authentication.
-
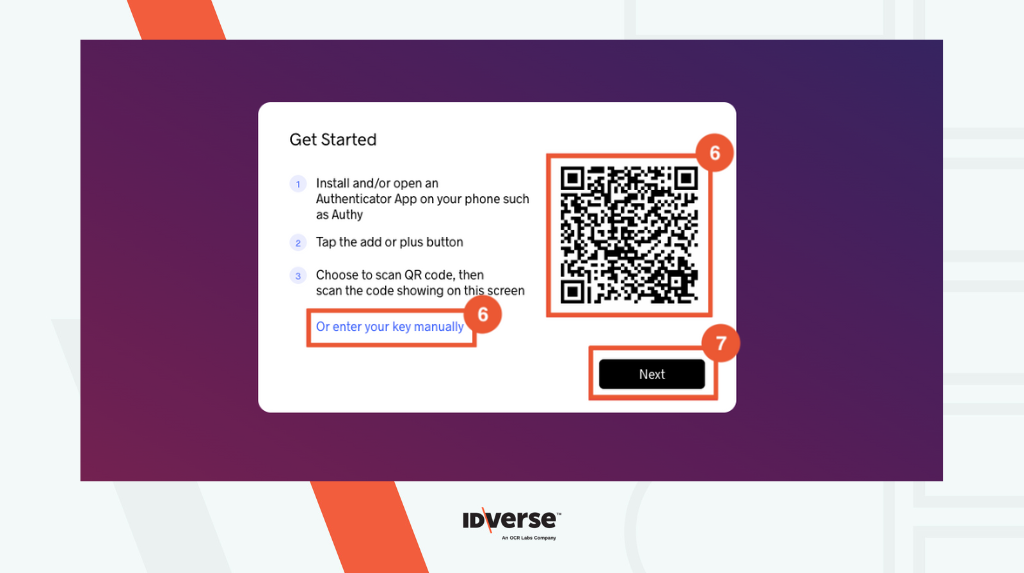
On your phone, launch the authenticator app. Tap the add or plus button to add a new account or platform. You can either choose to scan the QR code or enter your key manually.
-
Click on the Next button to proceed.
- Type in the authentication code you got from your authenticator app > click on the Next button.

Remember!
The 6-digits code is only valid for 30 seconds. After that, the authenticator will regenerate a new code automatically.
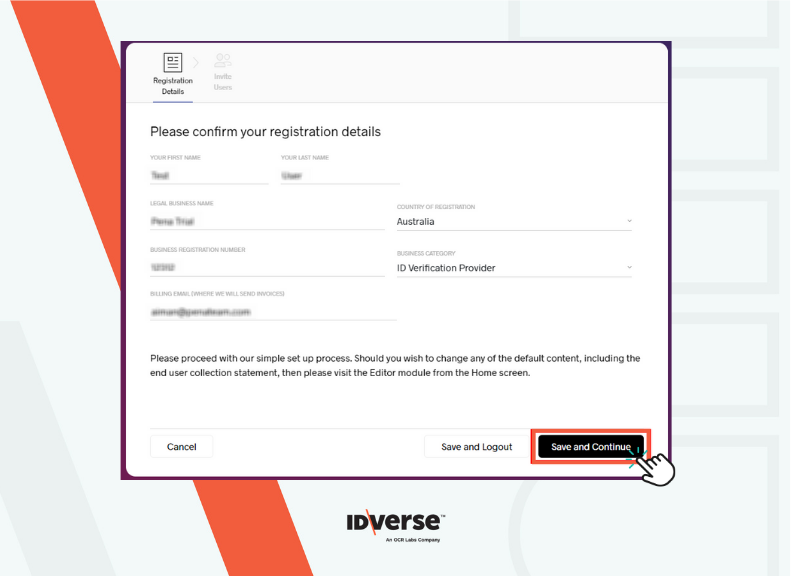
- Confirm your registration details by entering your country of residence, business registration number, etc., and click Save and Continue to proceed.
- You can create new users here if you want to. Otherwise, you can just Save and Continue and invite or create users later on from the portal.

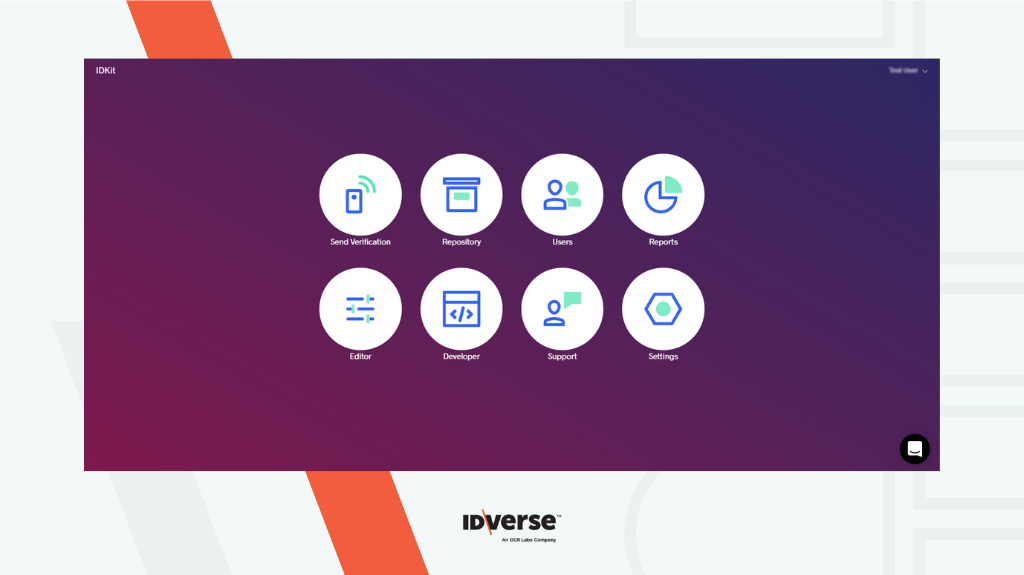
- Voila! You successfully got into the IDKit portal.
Info:
Check out the User Login page if you want to log in.
Country and Documents Settings
After you have signed in, to set up the countries and the acceptable documents for ID verification, if not already set up, you need to follow the steps mentioned below:
- Go to the Settings menu from the portal.

- From the settings, click on Configuration.

You can find the identity verification flows you signed up for, data provider details, SMS settings, and age acceptance rules. From here, you can set up countries and acceptable documents for your verification flow.

A list of the documents and countries you set up will be displayed in the portal that you can edit as needed.
Note:
To learn more about how to set up Countries and supported Documents visit this article.
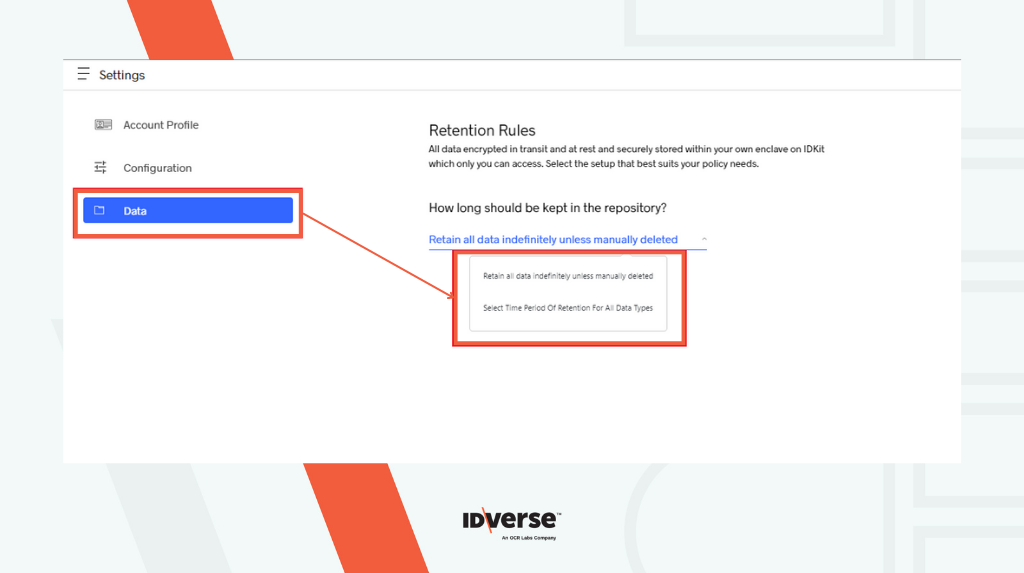
Data Retention Settings
In the settings menu, you can also select how you want to retain the data. Your data is encrypted in transit and at rest, and it is securely stored in your portal with access restrictions. Select the retention rule that suits your policy needs the best by following these steps:
- Once you are in Settings, click on Data.
- From here, you can select a data retention method as per your preference. You can either choose to retain all the data for an indefinite period or select any time period until when you would like to retain the data.
Note:
For a step-by-step guide to set up Data Retention rules as per your policy please refer here.
💬 We Are Here to Help!
If you encounter an issue, a bug, or require assistance, please contact our support page here to find the solution. Don't forget to provide any important information on the issue.
Updated 8 months ago